자바 스크립트 함수로 포스팅박스를 여닫는 기능을 추가해보자.
<script>

    function openclose(){
        let status=$('#post-box').css('display');
        if(status=='block') {
            $('#post-box').hide();
            $('#btn-post-box').text('포스팅박스 열기');
        }
        else{
            $('#post-box').show();
            $('#btn-post-box').text('포스팅박스 닫기');

        }
    }
</script>
1. 버튼을 눌렀을 때 포스팅박스를 열고 닫을 수 있게 한다.
2. status라는 변수를 생성해서 현재 포스트박스가 보이는지 안 보이는지 판단을 해주게 된다.
3. 포스트박스가 열려있는 상태라면 block이 반환되므로,
4. 현재 status가 block이라면 버튼을 눌렀을 때 포스트박스를 닫아야 하기 때문에 hide()를 사용
5. 그게 아니라면 버튼을 눌렀을 때 포스트박스를 열어야 하기 때문에 show()를 사용
그리고 페이지를 들어왔을 때 포스팅박스가 닫혀있는 상태로 만들려면 posting-box css부분에 display:none;을 추가
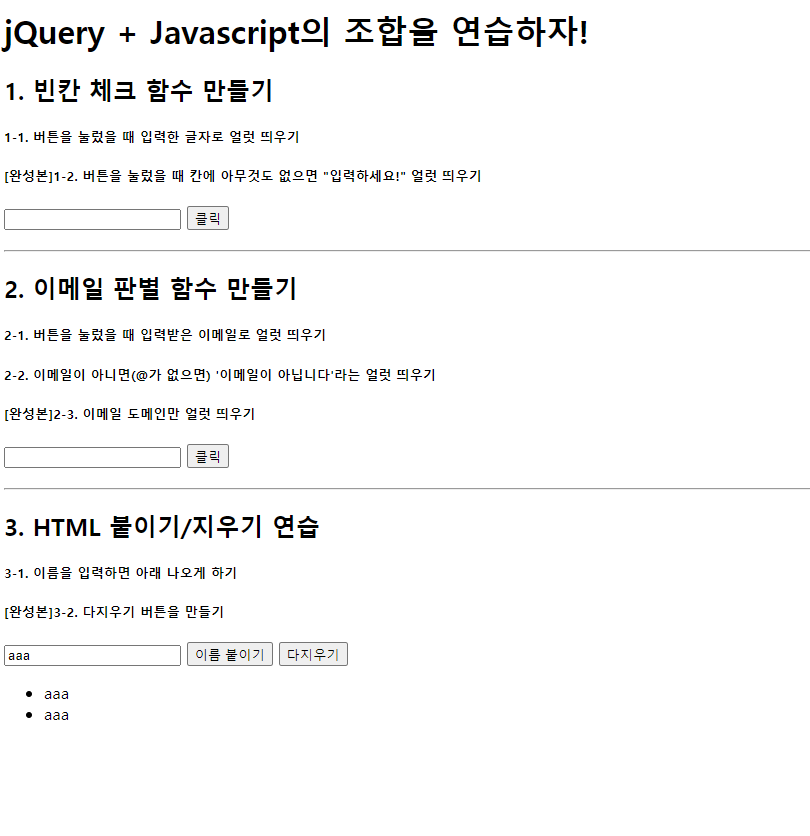
-JQuery 연습-
<!doctype html>
<html lang="ko">

<head>
    <meta charset="UTF-8">
    <title>jQuery 연습하고 가기!</title>

    <!-- JQuery를 import 합니다 -->
    <script src="https://ajax.googleapis.com/ajax/libs/jquery/3.4.1/jquery.min.js"></script>

    <style type="text/css">
        div.question-box {
            margin: 10px 0 20px 0;
        }
    </style>

    <script>
        function q1() {
            // 1. input-q1의 입력값을 가져온다. $('# .... ').val() 이렇게!
                let text=$('#input-q1').val();

            // 2. 만약 입력값이 빈칸이면 if(입력값=='')
            if(text==''){
                alert('내용을 입력해주세요.')// 3. 알림창 띄우기
            } else{
                alert(text)// 4. alert(입력값) 띄우기
            }


        }

        function q2() {
            // 1. input-q2 값을 가져온다.
            let text=$('#input-q2').val();
            // 2. 만약 가져온 값에 @가 있으면 (includes 이용하기 - 구글링!)
            if(text.includes('@')){
                let domain=text.split('@')[1].split('.')[0]// 3. 이메일에서 이메일 도메인만 추출해서 ( .split('@') 을 이용)
                alert(domain)// 4. alert(도메인 값);으로 띄우기
            }else{
                alert('이메일의 형태가 맞지 않습니다.')// 5. 만약 이메일이 아니면 '이메일이 아닙니다.' 라는 얼럿 띄우기
            }


        }

        function q3() {
            // 1. input-q3 값을 가져온다. let txt = ... q1, q2에서 했던 걸 참고!
            let text=$('#input-q3').val();
            // 2. 가져온 값을 이용해 names-q3에 붙일 태그를 만든다. (let temp_html = `<li>${txt}</li>`) 요렇게!
            let temp_html=`<li>${text}</li>`

           $('#names-q3').append(temp_html); // 3. 만들어둔 temp_html을 names-q3에 붙인다.(jQuery의 $('...').append(temp_html)을 이용하면 굿!)
        }

        function q3_remove() {
            // 1. names-q3의 내부 태그를 모두 비운다.(jQuery의 $('....').empty()를 이용하면 굿!)
            $('#names-q3').empty();
        }

    </script>

</head>

<body>
    <h1>jQuery + Javascript의 조합을 연습하자!</h1>

    <div class="question-box">
        <h2>1. 빈칸 체크 함수 만들기</h2>
        <h5>1-1. 버튼을 눌렀을 때 입력한 글자로 얼럿 띄우기</h5>
        <h5>[완성본]1-2. 버튼을 눌렀을 때 칸에 아무것도 없으면 "입력하세요!" 얼럿 띄우기</h5>
        <input id="input-q1" type="text" /> <button onclick="q1()">클릭</button>
    </div>
    <hr />
    <div class="question-box">
        <h2>2. 이메일 판별 함수 만들기</h2>
        <h5>2-1. 버튼을 눌렀을 때 입력받은 이메일로 얼럿 띄우기</h5>
        <h5>2-2. 이메일이 아니면(@가 없으면) '이메일이 아닙니다'라는 얼럿 띄우기</h5>
        <h5>[완성본]2-3. 이메일 도메인만 얼럿 띄우기</h5>
        <input id="input-q2" type="text" /> <button onclick="q2()">클릭</button>
    </div>
    <hr />
    <div class="question-box">
        <h2>3. HTML 붙이기/지우기 연습</h2>
        <h5>3-1. 이름을 입력하면 아래 나오게 하기</h5>
        <h5>[완성본]3-2. 다지우기 버튼을 만들기</h5>
        <input id="input-q3" type="text" placeholder="여기에 이름을 입력" />
        <button onclick="q3()">이름 붙이기</button>
        <button onclick="q3_remove()">다지우기</button>
        <ul id="names-q3">
            <li>세종대왕</li>
            <li>임꺽정</li>
        </ul>
    </div>
</body>

</html>
'웹' 카테고리의 다른 글
| 10. Ajax 연습 (0) | 2021.08.26 |
|---|---|
| 9. Ajax (0) | 2021.08.25 |
| 7. JQuery (0) | 2021.08.23 |
| 6. 부트스트랩을 이용해서 상품페이지 틀 만들어보기 (0) | 2021.08.22 |
| 5. 부트스트랩 이용해서 포스팅박스 추가하기 (0) | 2021.08.21 |


댓글